Welcome to KenbakKit.com! Home of the Official Kenbak-1 Reproduction Kit! |
| Comparing the Vintage
Kenbak-1 to the Modern Series 2 Please contact me with ANY questions or comments you have after reading this. Thanks! I am not done writing this section either! Please come back soon! Throughout the development of the Kenbak-1 Series 2 I tried as hard as I could to make it as close to the vintage unit as possible. At the same time I had to also consider the impact that a new Kenbak-1 could have on the value of an original Kenbak-1. The main difference that is easily seen from the outside is the name, "KENBAK-1" vs "KENBAK-1 Series 2". (The idea for the name suffix of "Series 2" came from Todd Fischer's IMSAI Series 2!)  The Kenbak-1 Series 2 reproduction  Erik Klein's vintage Kenbak-1 (these pictures were taken in different situations so I wouldn't use them to judge the paint color ; ) ) I made a few modifications to the silkscreen that are not obvious unless you look for them. Look at the difference between "4" under bit 2 for example. Some of them you may not see unless you measure! 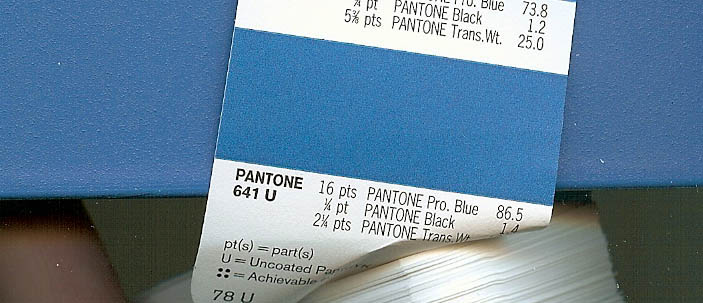 The color code used on the reproduction case compared to a vintage Kenbak-1 case. This was the closest match we could find. Because the paper is a different coating surface than the steel/aluminum its hard to tell how different they will look side by side. I will mail my Kenbak-1 Series 2 to Erik Klein in the future for him to photograph next to his vintage unit. : ) Erik Klein also spent hours helping me generate drawings for the case. Without him the case would only "look" the same. I bought 3", 6", and 24" digital calipers and had them mailed to Erik. I asked him to take pictures of his Kenbak, I marked them up with measurement requests, and mailed them back to him. He went above and beyond what I expected and took 3 measurements for each location and averaged the result. Here is a sample (reduced in size) of one of the dozens of images I sent him for measurements 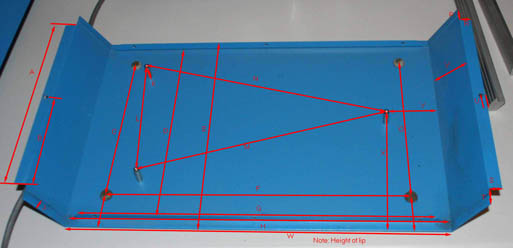 John Blankenbaker had an unpopulated Kenbak-1 PCB that he loaned to me for the project. I mailed this board to a company called Mile High Testing (located in Longmont Colorado..."mile high"). I have used them to scan dozens of boards in the past and they did a GREAT job on this project. I recommend them to anyone who requires raw PCB to Gerber file conversion! They scan the PCB on a special calibrated scanner at 1200dpi and with the assistance of computer software (similar to OCR, but requires human feedback) recreate CAD files for the PCB. Here is a small slice of the cad file as seen on my computer screen. 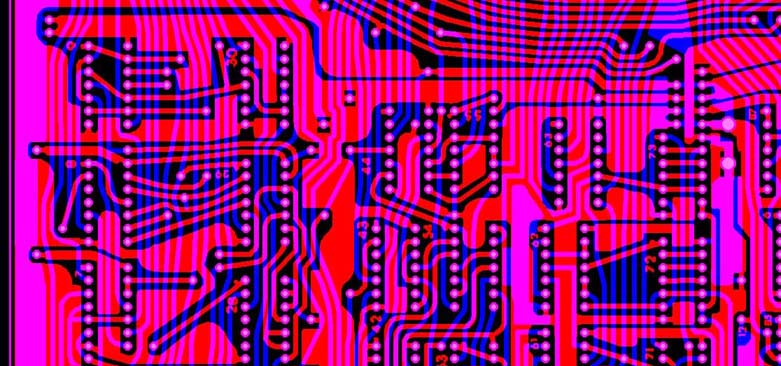 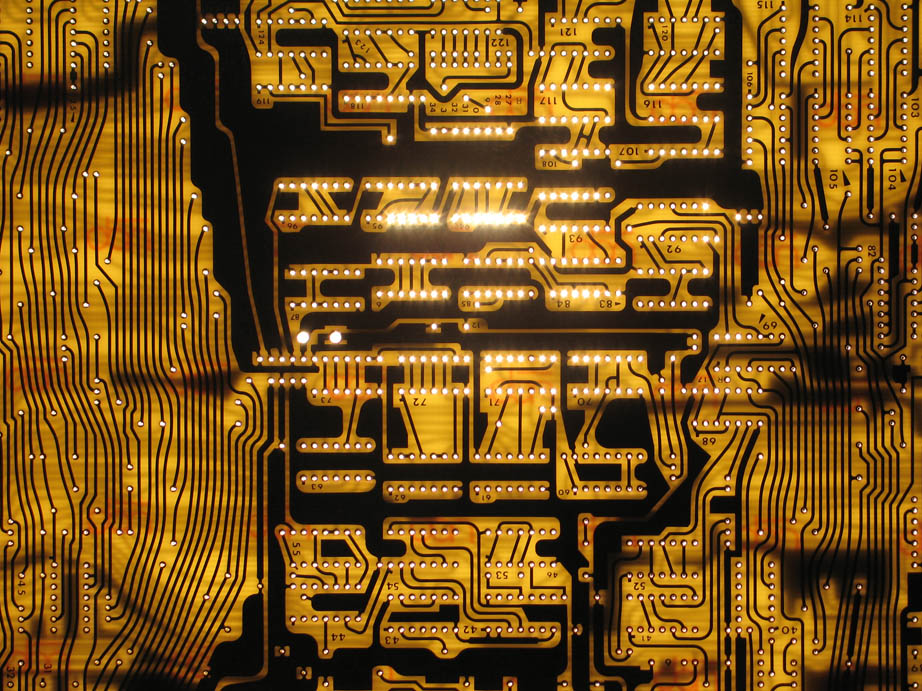 The above picture was made by placing a reproduction Kenbak-1 Series 2 PCB on top of the vintage Kenbak-1 PCB and shining a light at them. The light passing through the holes proves that the reproduction PCBs are very accurate, down to the placement of holes! The replica board is identical except for the text "Homebrew 2007" and "http://www.kenbakkit.com". This is to help with counterfeit units. 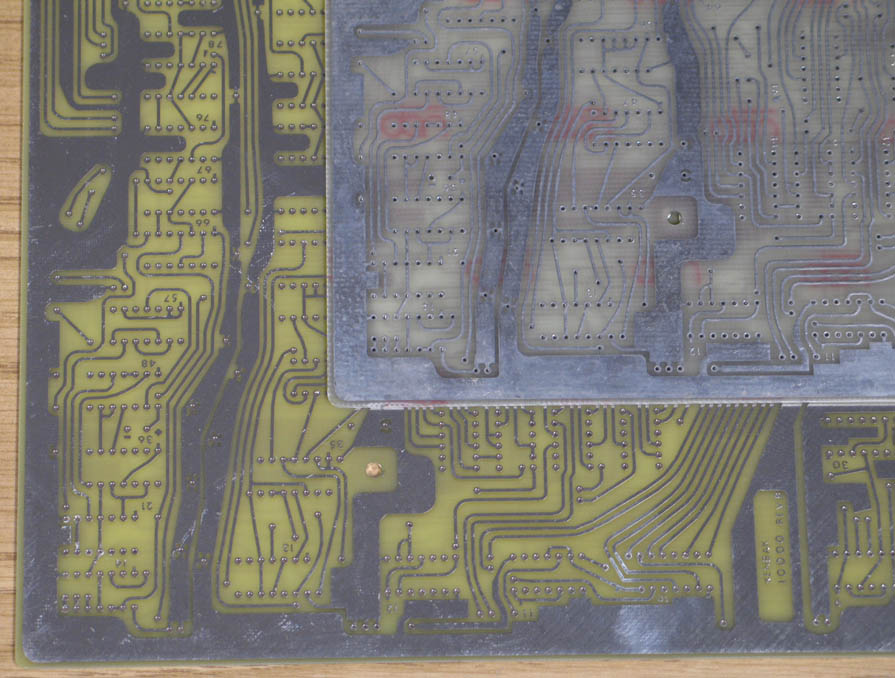 Reproduction board is yellowish, vintage board is grayish. I'll try to get some better PCB comparisn pictures soon. 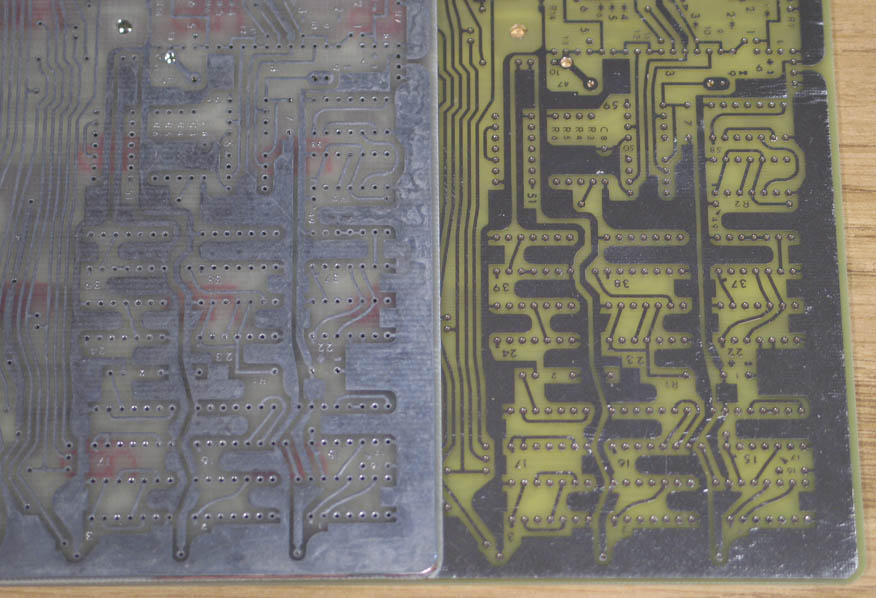 Visit Stockly Electronics Forums for more pictures as they become available! |
| ©2007 Grant Stockly
|